


Learn how to relieve knee pain with kinesiology tape
Follow our step-by-step kinesiology taping guide — at home.
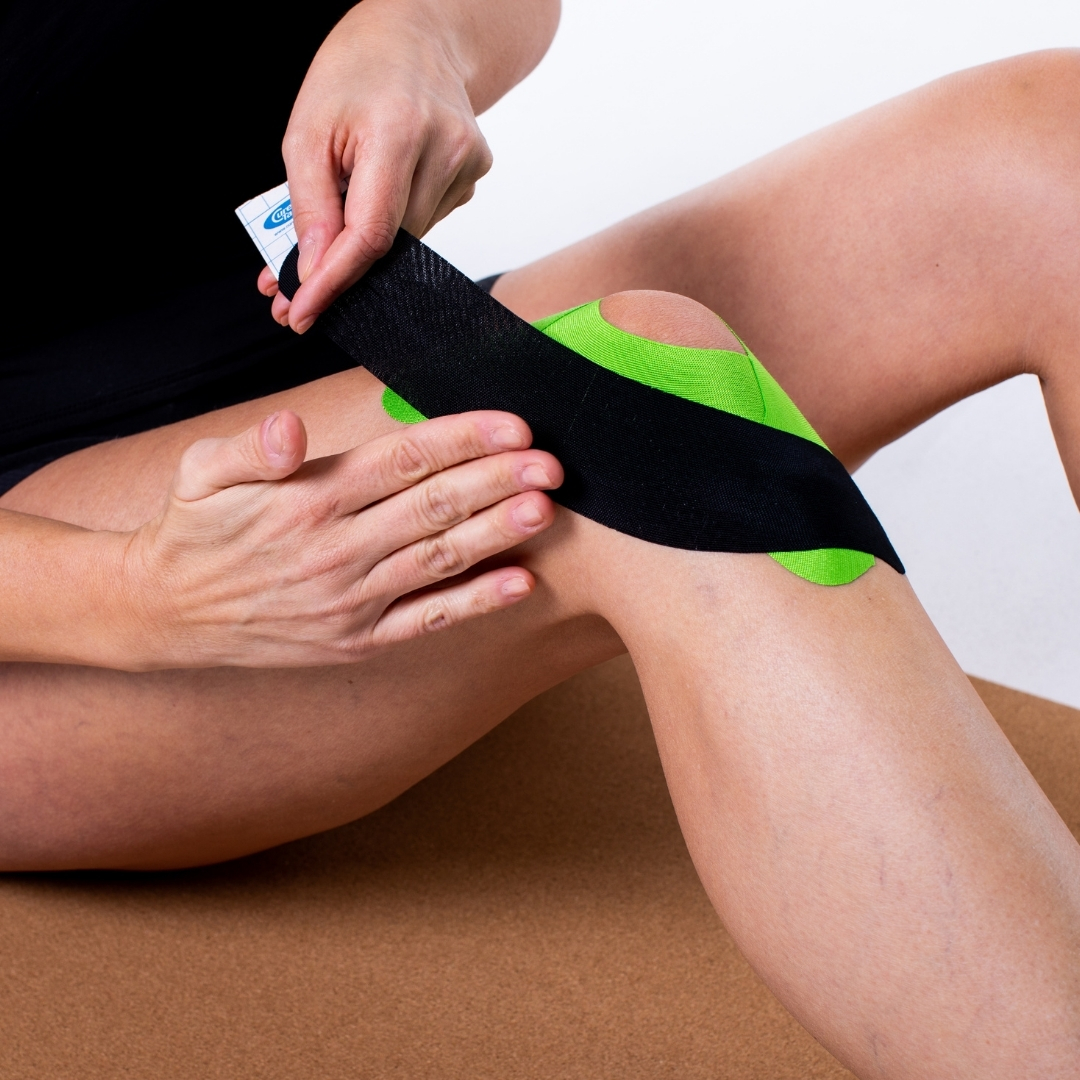
Do you want to learn how to tape your knee on your own? In this article we’ll guide you step by step through the process.
If you are experiencing general knee pain that you can’t really pinpoint to one exact spot, this taping method may help. It takes pressure off the joint, gives your knee support and often creates a more stable feeling.
Jump to: Preparation · Measuring & cutting · Application
-

MyCureTape® Sports 3-Roll Combi Pack
€17,95In stockSelect options This product has multiple variants. The options may be chosen on the product page

This taping method may help with:
Relieve pain
Reduce tension and discomfort in the affected area
Support the tissue
Gentle stabilisation during movement and recovery
Improve movement
More comfortable daily activities during recovery
Support recovery
Allow overloaded tissue to recover while staying active
It can be applied for:
Overuse complaints
Pain from repetitive strain or prolonged activity
Acute injury support
Additional stability after sudden strain or sprain
Sports-related pain
Support during training and return to sport
Daily discomfort
Relief during walking, standing, or daily tasks
Taping your knee for general pain relief
Tips to ensure your knee taping treatment goes smoothly:
Always make sure you understand the underlying cause of your knee pain before applying tape.
Review the step-by-step instructions carefully prior to starting.
Pick a tape color you feel comfortable with.
Never stretch the tape at the beginning or end; apply anchors without tension.
Rub the tape thoroughly after application to activate the adhesive.
Keep in mind there may be contraindications where taping should be avoided.
On average, tape can stay in place for about 3–7 days.
You can safely shower with the tape on.
When removing, using a little oil makes the process much easier.
Preparation for taping general knee pain
- Shape
- I-strips
- Number of strips
- 4.
- Technique
- ligament technique (full stretch).
Measuring and cutting the kinesiology tape
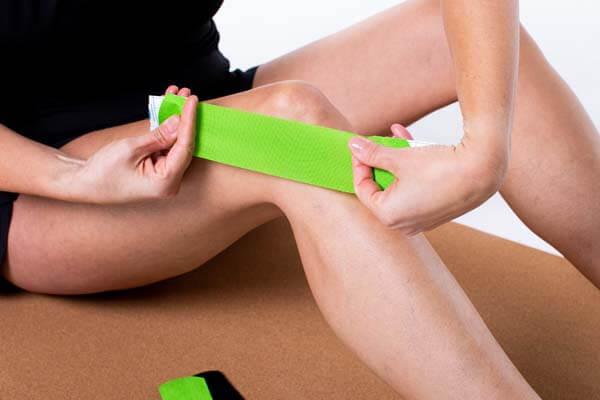
Measure & Cut
- Cut two strips of tape about 6 inches long and another two strips approximately 8 inches in length.
Applying the tape to your knee
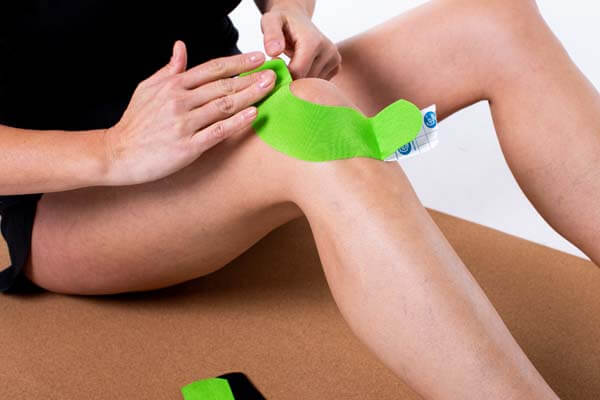
Step 2
- Sit comfortably on the ground with your knee slightly bent and maintain this angle during the full taping routine.
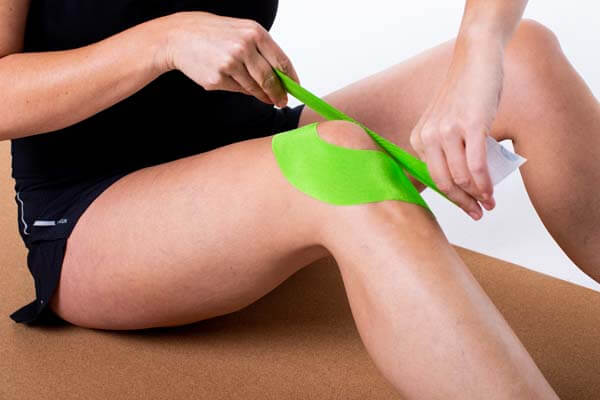
Step 3
- Begin by placing the first 6-inch strip directly over the spot where the discomfort is strongest.
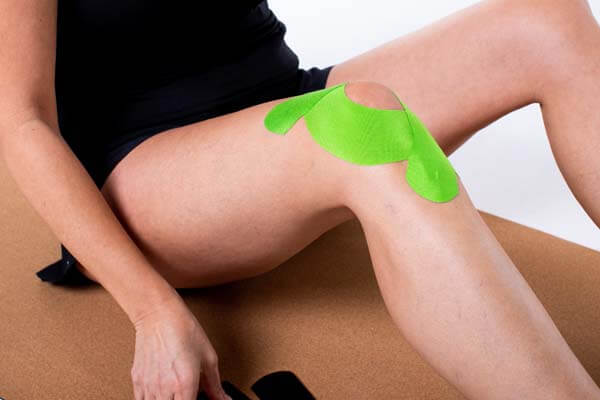
Step 4
- Split the paper backing in the center and fold it back toward both ends.
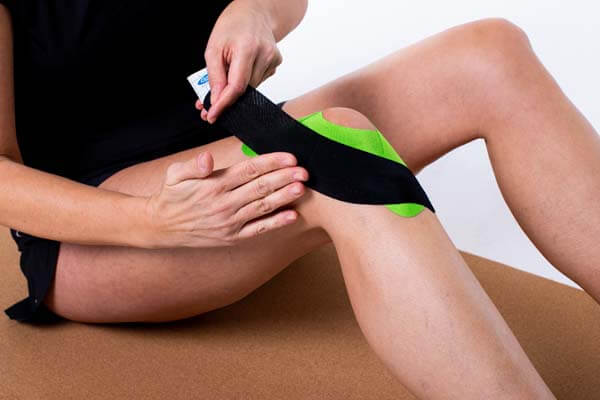
Step 5
- With firm stretch, guide the middle of the strip in a curved line around the kneecap, finishing by laying down the two anchors at the ends with no stretch.
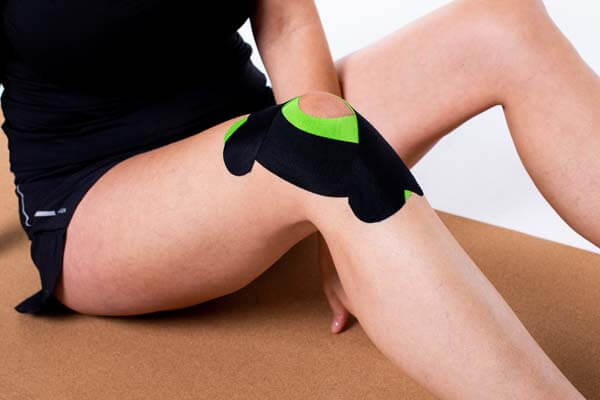
Step 6
- Do the same with the second 6-inch strip on the opposite side of the knee, mirroring the first application.
- Next, apply the third and fourth strips (8 inches each) at full stretch, overlapping them halfway over the first two strips.
- Finally, rub the tape thoroughly to activate the adhesive and keep it in place.
Popular products to tape your knee
-
CureTape® Classic
€9,95In stockSelect options This product has multiple variants. The options may be chosen on the product page -
CureTape® Sports Extra Sticky
€10,95In stockSelect options This product has multiple variants. The options may be chosen on the product page -
CureTape® Art
€10,95In stockSelect options This product has multiple variants. The options may be chosen on the product page -
CureTape® Soft Touch Scissor
€12,95In stockAdd to cart



 Trusted by professionals for 25+ years
 Europe-wide shipping
Free delivery from €100
Europe-wide shipping
Free delivery from €100 When taping your knee, it’s crucial to choose a tape that provides strong adhesion and support. That’s why I recommend CureTape kinesiology tape. For regular use, CureTape Classic or Art is ideal. However, if you’re engaging in extreme sports or swimming, opt for the extra sticky CureTape Sports variant! I have selected practical, easy-to-follow self-taping applications alongside a few valuable tips from clinical experience. For an optimal recovery, remember to combine this taping with specific knee strengthening exercises, and always consult a physiotherapist or GP if your symptoms persist.
For these self-taping instructions, I’ve selected applications that are simple enough to apply on your own. To make sure the treatment is safe and effective, I share some practical guidelines you should keep in mind before, during, and after taping. These tips come from many years of hands-on experience in the clinic. If your symptoms don’t improve, it’s always best to consult a therapist or your doctor.

Disclaimer: Please note: the suggested tape applications and the information on our website regarding the possibilities of the Medical Taping Concept are not yet scientifically proven. The stated claims are based primarily on extensive experience from therapists and users of CureTape® products. No rights can be derived from the content on this website.
Contraindications for not using tape: pregnancy, open wounds, bone fractures, unexplained complaints, allergies and skin conditions, medication use such as blood thinners, thrombosis, and fever. Always consult a medical professional if in doubt.